


官方公众号企业安全新浪微博

FreeBuf.COM网络安全行业门户,每日发布专业的安全资讯、技术剖析。

FreeBuf+小程序

- 关注
介绍:Frida是一款基于Python + JavaScript的轻量级Hook框架。
0x00 前言
前段时间参加了AntCTF X D^3CTF当时只是简单看了看,赛后复现了几道简单逆向题目,看到一个Android题目,没有什么思路,最后在别人的WriteUp中发现通过Android Hook技术就能将该题目解出来,于是我打算去学习下Frida这款轻量级Hook框架。
0x01 介绍
Friad是一款跨平台轻量级Hook和调试框架,可以轻松实现Windows、Linux、Android、IOS、Mac平台的动态插桩需求,单从Android层面理解,它可以实现Java层和Native层Hook操作。
Frida分为客户端和服务端,客户端通过Python代码将需要被注入的JS代码提交到服务端,然后接受服务端消息;服务端接受JS代码并将其注入到目标进程中,操作内存空间然后给客户端发送消息。
0x02 安装
由于Frida是基于Python + JavaScript,其客户端最简单的安装方式是通过pip工具。且其官网建议使用Python 3.x版本进行安装。
2.1 通过pip工具安装
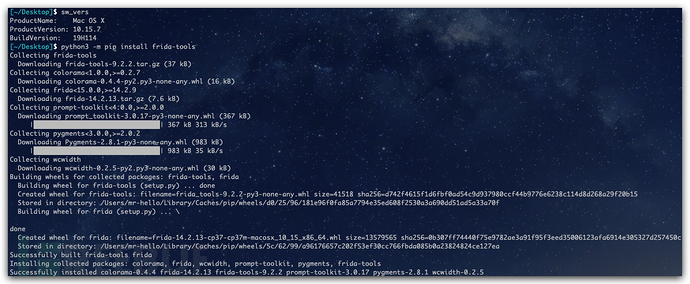
pip install frida-tools

python3 -m pip install frida-tools  #如果你的环境中有多个python版本,可以使用该命令指定python版本

2.2 通过github手动安装
请通过github下载源码,选取相应平台版本进行手动安装github地址
2.3 安装服务端
根据自身系统架构,在github选取对应版本进行下载即可。一定要与调试机系统架构一致。
# 我使用Android模拟器进行调试,使用下面命令获取系统架构信息
$ adb shell getprop ro.product.cpu.abi
x86
使用adb工具将下载好的server端上传到模拟器或手机端,设置权限并且执行,手机或模拟器需root。
adb push frida-server-14.2.13-android-x86 /data/local/tmp/

adb shell

cd /data/local/tmp/

chmod 777 frida-server-14.2.13-android-x86

./frida-server-14.2.13-android-x86
将Android TCP端口转发到本地。
adb forward tcp:27042 tcp:27042
adb forward tcp:27043 tcp:27043
0x03 使用入门
3.1 修改函数返回值
先使用Android studio写个Demo。
package com.hello.hook;

import androidx.appcompat.app.AppCompatActivity;

import android.os.Bundle;
import android.view.View;
import android.widget.Button;
import android.widget.TextView;

public class MainActivity extends AppCompatActivity {

    @Override
    protected void onCreate(Bundle savedInstanceState) {
        super.onCreate(savedInstanceState);
        setContentView(R.layout.activity_main);
        final TextView textView = findViewById(R.id.textView);
        Button bu = findViewById(R.id.button);
        bu.setOnClickListener(new View.OnClickListener() {
            @Override
            public void onClick(View view) {textView.setText(hook());}});
    }

    public String hook(){
        String st = "123456";
        return st;
    }
}
接下来套用Frida Hook函数返回值代码。
import frida #导入frida模块
import sys #导入sys模块
jscode = """
Java.perform(function(){
var MainActivity = Java.use('com.hello.hook.MainActivity'); //获得MainActivity类
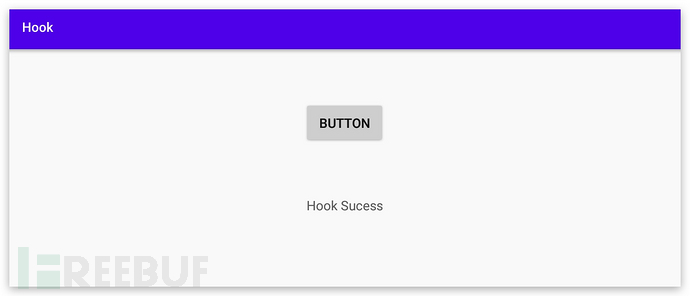
MainActivity.hook.implementation = function(){ //Hook 函数,用js自己实现
send('Statr! Hook!'); //发送信息,用于回调python中的函数
return 'Hook Sucess' //劫持返回值,修改为我们想要返回的字符串
}
});
"""
def on_message(message,data): #js中执行send函数后要回调的函数
print(message)
process = frida.get_remote_device().attach('com.hello.hook') #得到设备并劫持进程com.example.testfrida(该开始用get_usb_device函数用来获取设备,但是一直报错找不到设备,改用get_remote_device函数即可解决这个问题)
script = process.create_script(jscode) #创建js脚本
script.on('message',on_message) #加载回调函数,也就是js中执行send函数规定要执行的python函数
script.load() #加载脚本
sys.stdin.read()
3.2 修改变量值
官网给了一个2015年的CTF题目,直接拿过来演示。
import frida  #导入frida模块
import sys    #导入sys模块

jscode = """
    Java.perform(function () {
  // Function to hook is defined here
      var MainActivity = Java.use('com.example.seccon2015.rock_paper_scissors.MainActivity');

      // Whenever button is clicked
      var onClick = MainActivity.onClick;
      onClick.implementation = function (v) {
        // Show a message to know that the function got called
        send('onClick');

        // Call the original onClick handler
        onClick.call(this, v);

        // Set our values after running the original onClick handler
        this.m.value = 0;
        this.n.value = 1;
        this.cnt.value = 999;

        // Log to the console that it's done, and we should have the flag!
        console.log('Done:' + JSON.stringify(this.cnt));
    };
    });
"""

def on_message(message,data): #js中执行send函数后要回调的函数
    print(message)

process = frida.get_remote_device().attach('com.example.seccon2015.rock_paper_scissors') #得到设备并劫持进程com.example.testfrida(该开始用get_usb_device函数用来获取设备,但是一直报错找不到设备,改用get_remote_device函数即可解决这个问题)
script = process.create_script(jscode) #创建js脚本
script.on('message',on_message) #加载回调函数,也就是js中执行send函数规定要执行的python函数
script.load() #加载脚本
sys.stdin.read()
Hook实现得到最终答案。
3.3 修改函数参数
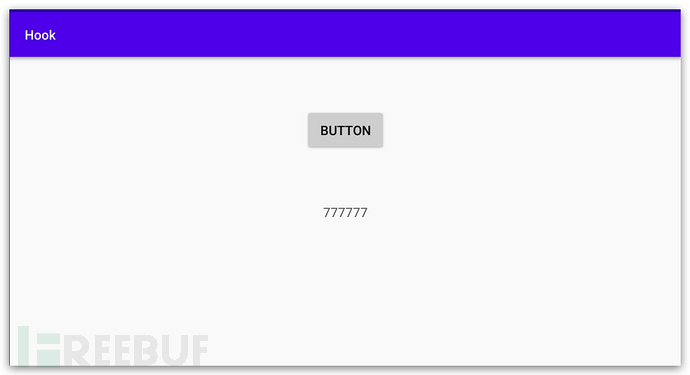
继续使用自己写的APK Demo,将其中的Hook函数参数进行更改。
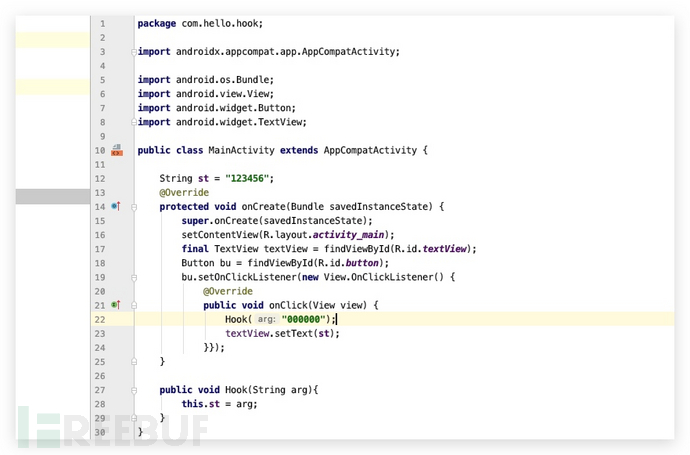
将Hook函数的参数000000更改为777777。
import frida  #导入frida模块
import sys    #导入sys模块

jscode = """
    /* Java.perform(function(){ ... Javascript代码成功被附加到目标进程时调用,我们核心的代码要在里面写。是个固定格式 */
    Java.perform(function(){

        /* Java.use方法用于声明一个Java类,在用一个Java类之前首先得声明。比如声明一个String类,要指定完整的类名var StringClass=Java.use("java.lang.String"); */
        var MainActivity = Java.use("com.hello.hook.MainActivity");

        /* 类.函数.overload(参数类型).implementation = function(形参名称){ */
        MainActivity.Hook.implementation = function(arg){
        console.log("Hook Start...");

        send('arg: '+ arg);

        /* 为了让程序正常运行,需要调用原方法将结果返回。若想修改参数值,可以在调用时直接将参数替换,
        如:return this.Hook("111"),但需注意参数类型的一致性。*/
        return this.Hook("777777");

        }
    });
"""

def on_message(message,data): #js中执行send函数后要回调的函数
    print(message)

process = frida.get_remote_device().attach('com.hello.hook') #得到设备并劫持进程com.example.testfrida(该开始用get_usb_device函数用来获取设备,但是一直报错找不到设备,改用get_remote_device函数即可解决这个问题)
script = process.create_script(jscode) #创建js脚本
script.on('message',on_message) #加载回调函数,也就是js中执行send函数规定要执行的python函数
script.load() #加载脚本
sys.stdin.read()
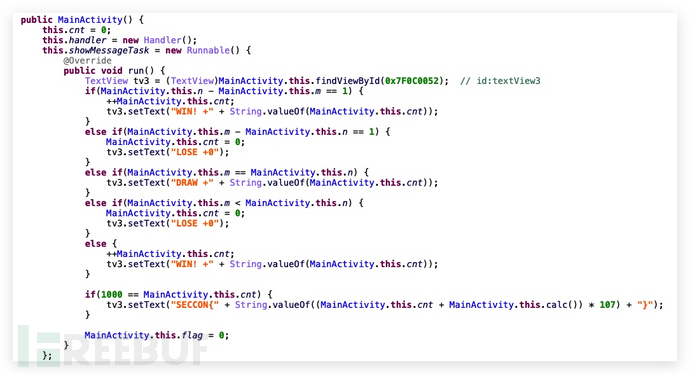
3.4 Hook Native层函数
继续使用官网给的APK Demo,将其中的calc函数 Hook。
import frida  #导入frida模块
import sys    #导入sys模块

jscode = """
    Java.perform(function () {
  // Function to hook is defined here
      var MainActivity = Java.use('com.example.seccon2015.rock_paper_scissors.MainActivity');

      // Whenever button is clicked
      var onClick = MainActivity.onClick;
      onClick.implementation = function (v) {
        // Show a message to know that the function got called
        send('onClick');

        // Call the original onClick handler
        onClick.call(this, v);

        // Set our values after running the original onClick handler
        this.m.value = 0;
        this.n.value = 1;
        this.cnt.value = 999;

        // Log to the console that it's done, and we should have the flag!
        console.log('Done:' + JSON.stringify(this.cnt));
    };

    // Hook so文件中的函数
    Interceptor.attach(Module.getExportByName('libcalc.so', 'Java_com_example_seccon2015_rock_1paper_1scissors_MainActivity_calc'), {
    onEnter: function(args) {
    },
    onLeave: function(retval) {
      // simply replace the value to be returned with 6
      retval.replace(6);
    }
});
    });
"""

def on_message(message,data): #js中执行send函数后要回调的函数
    print(message)

process = frida.get_remote_device().attach('com.example.seccon2015.rock_paper_scissors') #得到设备并劫持进程com.example.testfrida(该开始用get_usb_device函数用来获取设备,但是一直报错找不到设备,改用get_remote_device函数即可解决这个问题)
script = process.create_script(jscode) #创建js脚本
script.on('message',on_message) #加载回调函数,也就是js中执行send函数规定要执行的python函数
script.load() #加载脚本
sys.stdin.read()
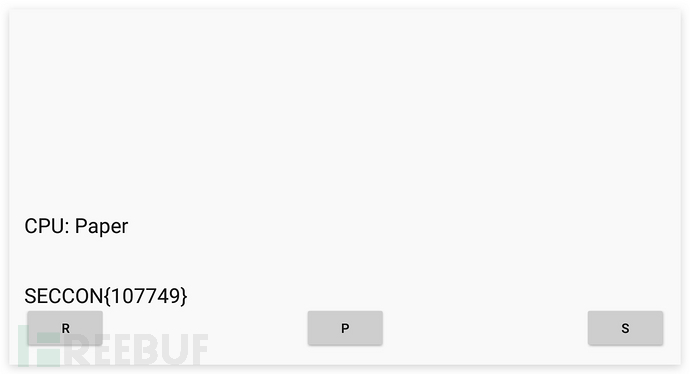
可以看到,最终flag已经发生变化。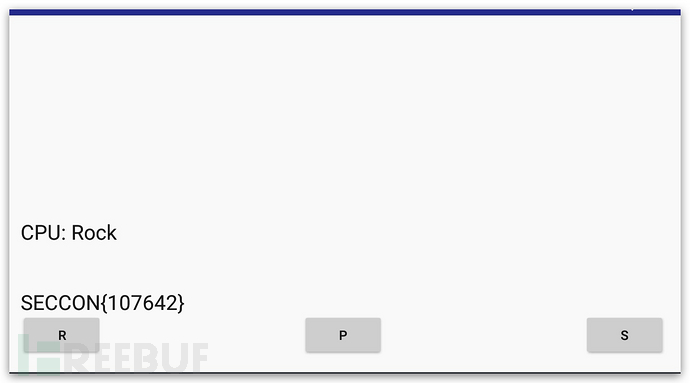
0x04 总结
以上,是Frida安装以及基本入门,Frida还有更高级的用法,大家可以去官网或者其他文章中去学习。
当我兴致勃勃的学习完了入门知识之后发现,AntCTF X D^3CTF中的那道Android题目竟然只允许在arm x64架构上运行,然而整个实验室的测试机,都是32位架构,最终还是没能复现,溜了溜了,挣钱买测试机去了。
作者: Mr-hello
如需授权、对文章有疑问或需删除稿件,请联系 FreeBuf 客服小蜜蜂(微信:freebee1024)
- 0 文章数
- 0 关注者