 secist
- 关注
0
1
2
3
4
5
6
7
8
9
0
1
2
3
4
5
6
7
8
9
0
1
2
3
4
5
6
7
8
9
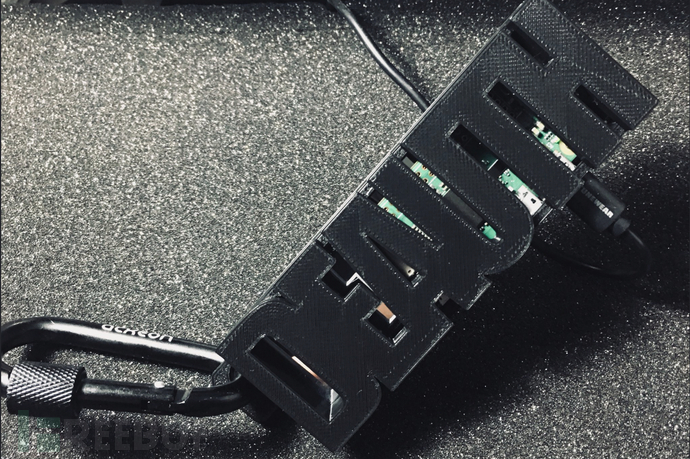
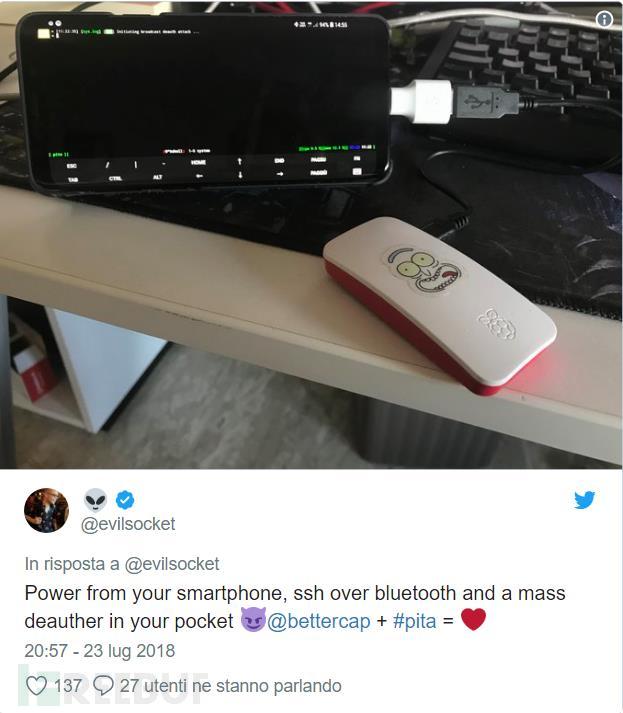
我并不是一个特别勤快的人,几天前我终于开始将我几周以来的一些想法付诸于实践,即使用Raspberry Pi Zero W制作一个可随身携带的迷你WiFi干扰器。有了它,我就可以随时随地的收集附近无线接入点及其连接客户端的相关信息,并可发送解除(deauthentication)数据包干扰WiFi(最初我只是想恶作剧),后来我意识到似乎将其用作WPA2握手包的嗅探更有意义。

[0x01] Kali image和初始无头(headless)配置
首先,你需要从此页面下载Kali Linux Rpi0w Nexmon镜像,并使用dd命令将其刻录到你将用于rpi的uSD卡上,但在解除挂载它之前,我们需要在引导时启用SSH,并配置其网络连接到我们家里的WiFi网络。请记住这只是暂时的,主要的wifi接口将用于稍后的数据包注入,而我们将能够通过蓝牙连接到主板。
如有必要,你可以在刻录镜像到micro sd的计算机上再次挂载它,然后:
# this will enable ssh at boot
touch /sd-mount-point/boot/ssh
# let's setup wlan0
nano /sd-mount-point/etc/network/interfaces
并在该文件中添加以下内容:
auto lo
iface lo inet loopback
allow-hotplug wlan0
iface wlan0 inet dhcp
wpa-conf /etc/wpa_supplicant/wpa_supplicant.conf
iface default inet dhcp
接着,我们来配置wpa_supplicant.conf文件(即配置我们希望rpi自动连接到的WiFi网络):
nano /sd-mount-point/etc/wpa_supplicant/wpa_supplicant.conf
如下:
country=GB
ctrl_interface=DIR=/var/run/wpa_supplicant GROUP=netdev
update_config=1
network={
        ssid="YourWiFiName"
        psk="y0urw1f!p455w0rd"
        key_mgmt=WPA-PSK
}然后我们重启RPI,此时它应该会自动连接到你的WiFi,搜索IP地址(通过ping广播,或使用bettercap,我通常使用netmon caplet来查看网络上发生了什么),最后使用默认的kali凭据并通过SSH连接到它:
# this will allow you to login with your SSH key instead of a password
ssh-copy-id -i ~/.ssh/id_rsa.pub root@pita-ip
ssh root@pita-ip
第一次登录后请务必执行以下操作:
# always change the default root password
passwd
# regenerate ssh keys
ssh-keygen
# set a nicer hostname :D
hostname -b pita
echo pita > /etc/hostname
echo "127.0.0.1 pita" >> /etc/hosts
# update the system
apt update
apt upgrade
# install a few useful packages and setup swap
apt install git dphys-swapfile
# set CONF_SWAPSIZE to 1024
nano /etc/dphys-swapfile
systemctl enable dphys-swapfile
# set the correct timezone
dpkg-reconfigure tzdata
# reboot to apply the effects
reboot
[0x02]通过蓝牙与bt-nap连接
如果我们希望将wlan0设置为监控模式并使用Nexmon注入,那么我们就需要有另一种方式来连接我们的板子。我们可以将rpi设置为bt-nap服务器,这样我们就能够通过蓝牙或是蓝牙上的IP地址进行连接,这么做还有个好处就是,它可以同时支持在笔记本电脑和智能手机上工作。

让我们再次通过WiFi和SSH连接:
ssh root@pita-ip
# install a few dependencies
apt install pulseaudio pulseaudio-module-zeroconf alsa-utils avahi-daemon pulseaudio-module-bluetooth
git clone https://github.com/bablokb/pi-btnap.git
# install btnap as a server
./pi-btnap/tools/install-btnap server
更改蓝牙配置文件/etc/systemd/system/bluetooth.target.wants/bluetooth.service中的ExecStart部分,禁用SAP插件:
ExecStart=/usr/lib/bluetooth/bluetoothd --noplugin=sap通过编辑/etc/bluetooth/main.conf文件设置设备蓝牙名称,最后编辑btnap配置文件/etc/btnap.conf:
MODE="server"
BR_DEV="br0"
BR_IP="192.168.20.99/24"
BR_GW="192.168.20.1"
ADD_IF="lo"
REMOTE_DEV=""
DEBUG=""
启动时启用所有服务并重启它们:
systemctl enable bluetooth
systemctl enable btnap
systemctl enable dnsmasq
service bluetooth restart
service dnsmasq restart
service btnap restart
在能够通过蓝牙连接之前,我们需要手动配对并信任我们将要使用的设备(请记住为每个你允许连接到PITA板的新设备重复此步骤)。请确保你的控制设备 (例如你的笔记本电脑)启用了蓝牙并且是可见的,然后从PITA板执行以下操作:
bluetoothctl
> agent on
> scan on
... wait for your device to show up ...
...
... now pair with its address
> pair aa:bb:cc:dd:ee:ff
... and trust it permantently ...
> trust aa:bb:cc:dd:ee:ff
... wait ...
> quit
现在我们来“释放”wlan0接口,将/etc/network/interfaces文件更改为:
auto lo
iface lo inet loopback
allow-hotplug wlan0
iface wlan0 inet static
禁用wpa_supplicant并重启:
service wpa_supplicant disable
reboot
重启后,你将能够通过蓝牙连接到主板。

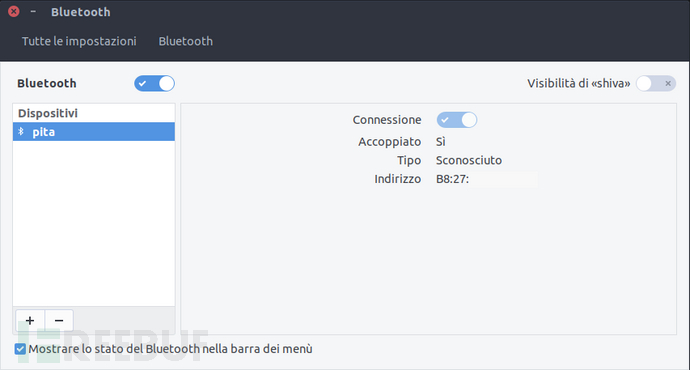
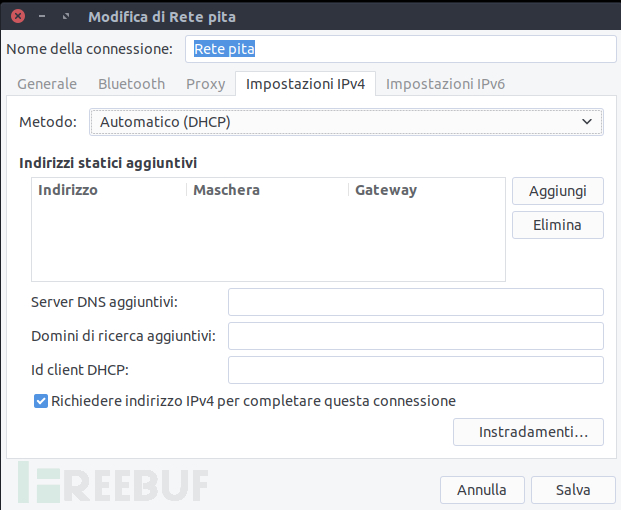
现在,你应该能够在你的系统的网络管理器中看到一个新的基于DHCP的Pita网络条目(这取决于你所使用的系统,在大多数GNU/Linux发行版和Android系统上都是自动检测到的):

连接后,你应该能够看到一个新的网络接口bnep0:

你最后可以通过蓝牙ssh到你的PITA板:)
echo "192.168.20.99 pita" >> /etc/hosts
ssh root@pita
[0x03]wlan0和bettercap
重要
为了安装bettercap并下载caplet,rpi需要能够连接到互联网,但我们只是释放了wlan0用于注入,所以现在你要么在迷你usb端口上插入一些以太网适配器,让智能手机处于网络共享模式,要么就是在最开始板子仍连接在WiFi时执行这些步骤。
现在我们可以从电源或智能手机为我们的电路板供电,我们可以通过蓝牙上的SSH连接到它,下一步是安装bettercap,我们将直接在PITA上编译它,这可能需要一段时间但非常简单:
apt install golang libpcap-dev libnetfilter-queue-dev wget build-essential
# you should make this persistent in your .bashrc or .zshrc file
export GOPATH=/root/gocode
mkdir -p $GOPATH
go get github.com/bettercap/bettercap
# wait
# let's install it for everyone to enjoy ^_^
cd /root/gocode/src/github.com/bettercap/bettercap
make
make install
# let's download the pita.cap caplet
cd /usr/share/bettercap/caplets/
wget "https://raw.githubusercontent.com/bettercap/caplets/master/pita.cap"
pita.cap caplet将负责在监控模式下启动wlan0,定期发送deauth数据包,并嗅探WPA2握手包。这是一个基本的例子,许多其他功能你可以在caplets repo中找到,通常在项目wiki中:
# More info about this caplet: https://twitter.com/evilsocket/status/1021367629901115392
set $ {bold}*参考来源:evilsocket,有secist编译,转载请注明来自FreeBuf.COM
如需授权、对文章有疑问或需删除稿件,请联系 FreeBuf 客服小蜜蜂(微信:freebee1024)


